Black Market items — full reference
The in-game BM info popup gives you the basics — rarity, affix count, durability classes. This page covers every effect that can roll, so you can make an informed call before spending Cu on something you can never repair.
New to the Black Market? Start with the Black Market items guide for the lifecycle and screen flow — this page is the deep reference you come back to.
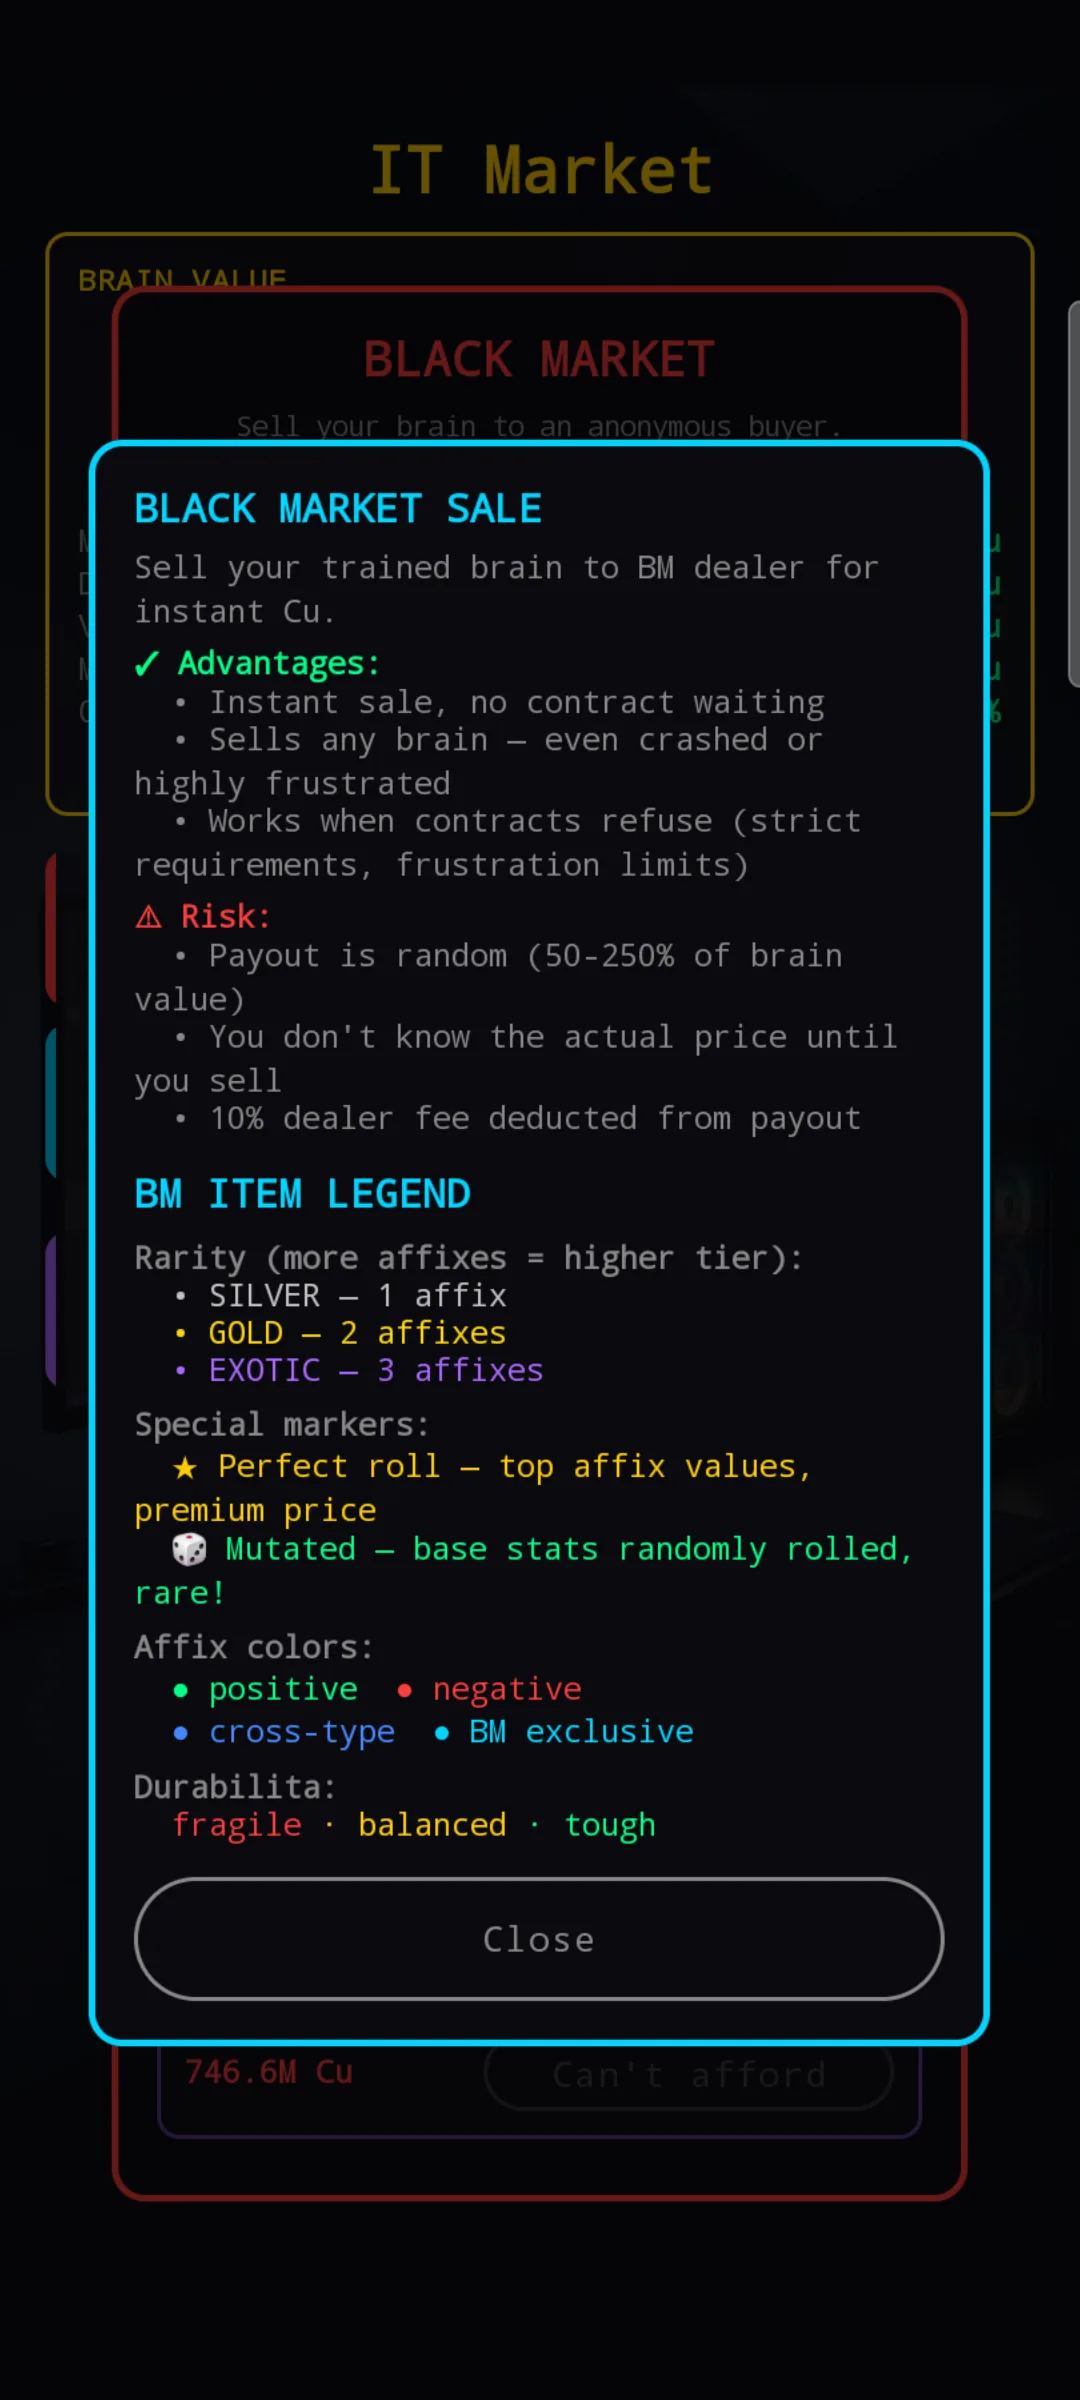
Rarity tiers
The in-game info popup highlights the visible difference: how many affixes the item carries. The tier also shapes the price you pay, how dramatically each affix rolls, and how often negatives slip in — but those don't appear on a number line you can read in-app.
| Rarity | Affixes | Price | Roll spread | Negative risk |
|---|---|---|---|---|
| Silver | 1 | Baseline | Tight | Moderate |
| Gold | 2 | Noticeably higher | Wider | Lowest |
| Exotic | 3 | Highest | Extreme | Highest |
Two non-obvious things to keep in mind:
- Exotic is the gamble, not the upgrade. The roll spread is dramatically wider, which means a perfect Exotic blows past anything Silver or Gold can produce — but the same width applies to negatives. Negative chance is also higher at Exotic than at Gold.
- Gold is the cleanest tier risk-wise. Lower negative chance than both Silver and Exotic, two affix slots for build flexibility. It's the workhorse tier; Exotic is the high-stakes bet.
Special markers in the shop
When browsing the BM shop, watch for these icons on item cards:
- ★ Perfect roll — the top affix value (≥ 90 % of the max possible roll). Premium price tag attached. These are the items worth saving Cu for.
- 🧬 Mutated — the item's base stats (VRAM / RAM / storage / steps per second) are randomly perturbed at generation time. Always a premium tag, but the perturbation can be either favorable or unfavorable — read the stat line.
- ◆ Cross-type affix — an affix from a different component category landed on this item (e.g. an HDD with a GPU-style -frustration perk). Wider effect coverage from a single slot.
- ● BM exclusive — only obtainable via the Black Market. See the BM-exclusive section below for the full list.
Affix colors
- ● positive (green) — beneficial effect.
- ● negative (red) — drawback (often paired with positives on the same item).
Durability classes
Every BM item already lasts about twice as long as the equivalent standard component — that's what the "BM items are UNREPAIRABLE — but they last 2× longer than standard HW!" notice in the shop is referring to. The durability class then nudges that baseline up or down, and trades it against stat ceiling in the opposite direction:
| Class | Stat ceiling | Lifespan |
|---|---|---|
| Fragile | Highest — glass cannon | Shortest (still longer than a standard part, just barely) |
| Balanced | Baseline | Standard — the typical BM roll, comfortably above a non-BM part |
| Tough | Lower than baseline | Longest |
Balanced is the most common roll. Fragile and Tough are the rarer ends — pick deliberately.
Combined with the rarity roll spread, a Fragile Exotic can hit absurd peak stat values but burns through faster. Tough Gold is the workhorse — steady stats, longest lifespan, easy to justify. Balanced anything is the safe default when you just want a reliable upgrade.
Affix catalog — Positive
GPU
- Overclocked — +10–25 % tok/s
- Lucky — +5–15 % Ru
- VRAM Boost (Gold+, gate-breaking) — +1–4 VRAM (flat)
- Calm Core — −5–25 % frustration
- Ergonomic — −5–25 % exhaustion
RAM
- Extra Slots (Gold+, gate-breaking) — +1–3 module slots (flat)
- Ru Generator — +8–20 % Ru
- Overclock — +5–15 % learning
- Zen Mode — −5–25 % frustration
- Comfort — −5–25 % exhaustion
HDD
- Domain Master (Gold+, gate-breaking) — +1–2 domain slots (flat)
- Scholar — +5–15 % learning
- Data Cache — +5–12 % Ru
- Organized — −5–25 % frustration
- Defragmented — −5–25 % exhaustion
Cooling
- Turbo — +10–25 % steps/click
- Liquid Flow — +10–25 % steps/sec
- Chill — −10–25 % frustration
- Cool Breeze — −10–25 % exhaustion
Affix catalog — Negative
Often paired with positives on the same item — the negative is why you're getting the positive at a "good" price.
GPU
- Unstable — +2–5 % frustration per run
- Power Hungry — +2–5 % exhaustion per run
- Noisy — −5–10 % Ru
RAM
- Leaky (Gold+, gate-breaking) — −1 module slot (flat)
- Slow — −5–10 % learning
- Noisy (RAM variant) — +1–3 % frustration per run
- Draining — +1–3 % exhaustion per run
HDD
- Corrupted (Gold+, gate-breaking) — −1 domain slot (flat)
- Fragmented — −5–15 % mastery gain
- Laggy — +2–5 % frustration on every domain switch
- Heat Sink (misleading name — it's a negative) — +1–3 % exhaustion per run
Cooling
- Loud — +2–5 % exhaustion per run
- Inefficient — +10–20 % frustration growth rate
- Throttled — −5–10 % tok/s when running hot
All types — rare
- Silence — disables MONOLOG, DIALOG, and CHAT modules entirely while equipped. Heavy debuff, low drop weight. Avoid unless you're stacking pure-numbers builds.
BM-exclusive affixes (● marker)
These appear only on BM items — you cannot roll them on standard HW.
- Quantum (GPU) — ±20 % tok/s per run (variance, not a fixed bonus). Sometimes amazing, sometimes a disaster. Good for risk-tolerant grinding.
- Overheated (GPU) — 10 % chance per run to gain +1 % frustration. Manageable cost on long runs, brutal on short.
- Neuromorphic (RAM) — +10–25 % brain learning. Cleanest of the four — straight upside, no condition.
- Experimental Liquid (Cooling) — boosts steps/click significantly but takes a 5 % instant durability hit at run start. Excellent for short bursts, terrible for endurance.
Pricing logic — why two similar items cost differently
Each item's final price is built from four factors stacked on top of the standard component's base price:
- Base price of the equivalent standard component.
- Rarity premium — Silver charges the baseline, Gold a noticeable bump, Exotic the most.
- Durability class — Fragile drops the price, Tough raises it, Balanced sits in the middle.
- Affix roll quality — each positive affix pushes the price up, each negative pushes it down, weighted by how strong the roll is. A "perfect" positive is much more expensive than the average one; a heavy negative can offset a positive almost completely.
The whole thing is then clamped to a sensible window — so even a negative-loaded item never drops below a floor of the rarity-adjusted base, and a perfectly-rolled item can't run away into the stratosphere.
The takeaway: a Silver with a single perfect roll can be priced near the top of its range, while a Gold loaded with negatives can come out cheaper than the standard component despite the rarity premium. Don't anchor on rarity alone — read the affix line.
How to think about buying
- Early game (Starter chassis) — a single inventory slot. Buy only Tough items with at least one strong positive. You can't afford to burn the slot on a Fragile gamble.
- Mid game (Builder / Deep) — 2 to 3 slots. Now you can specialize: one Tough utility piece + a Fragile burst piece for high-quality runs.
- Endgame (Cluster) — 4 slots. Stacking gate-breaking affixes (Extra Slots, Domain Master, VRAM Boost) is the path to builds the standard HW can't reach. Exotic becomes viable here because you can afford to lose them.
One last optimization: BM items degrade mainly from quality gain (with a small per-hour floor). At-cap Ru farming runs barely touch them — perfect for stretching the lifespan of a star item.