Hardware Shop
The Hardware Shop is where you build the rig under every brain. Four chassis tiers, four component categories, three rarities per size group, and a parallel rental track for emergencies. This page is both a help guide and the standard-HW reference baseline you can read alongside the Black Market items reference to judge any BM offer.
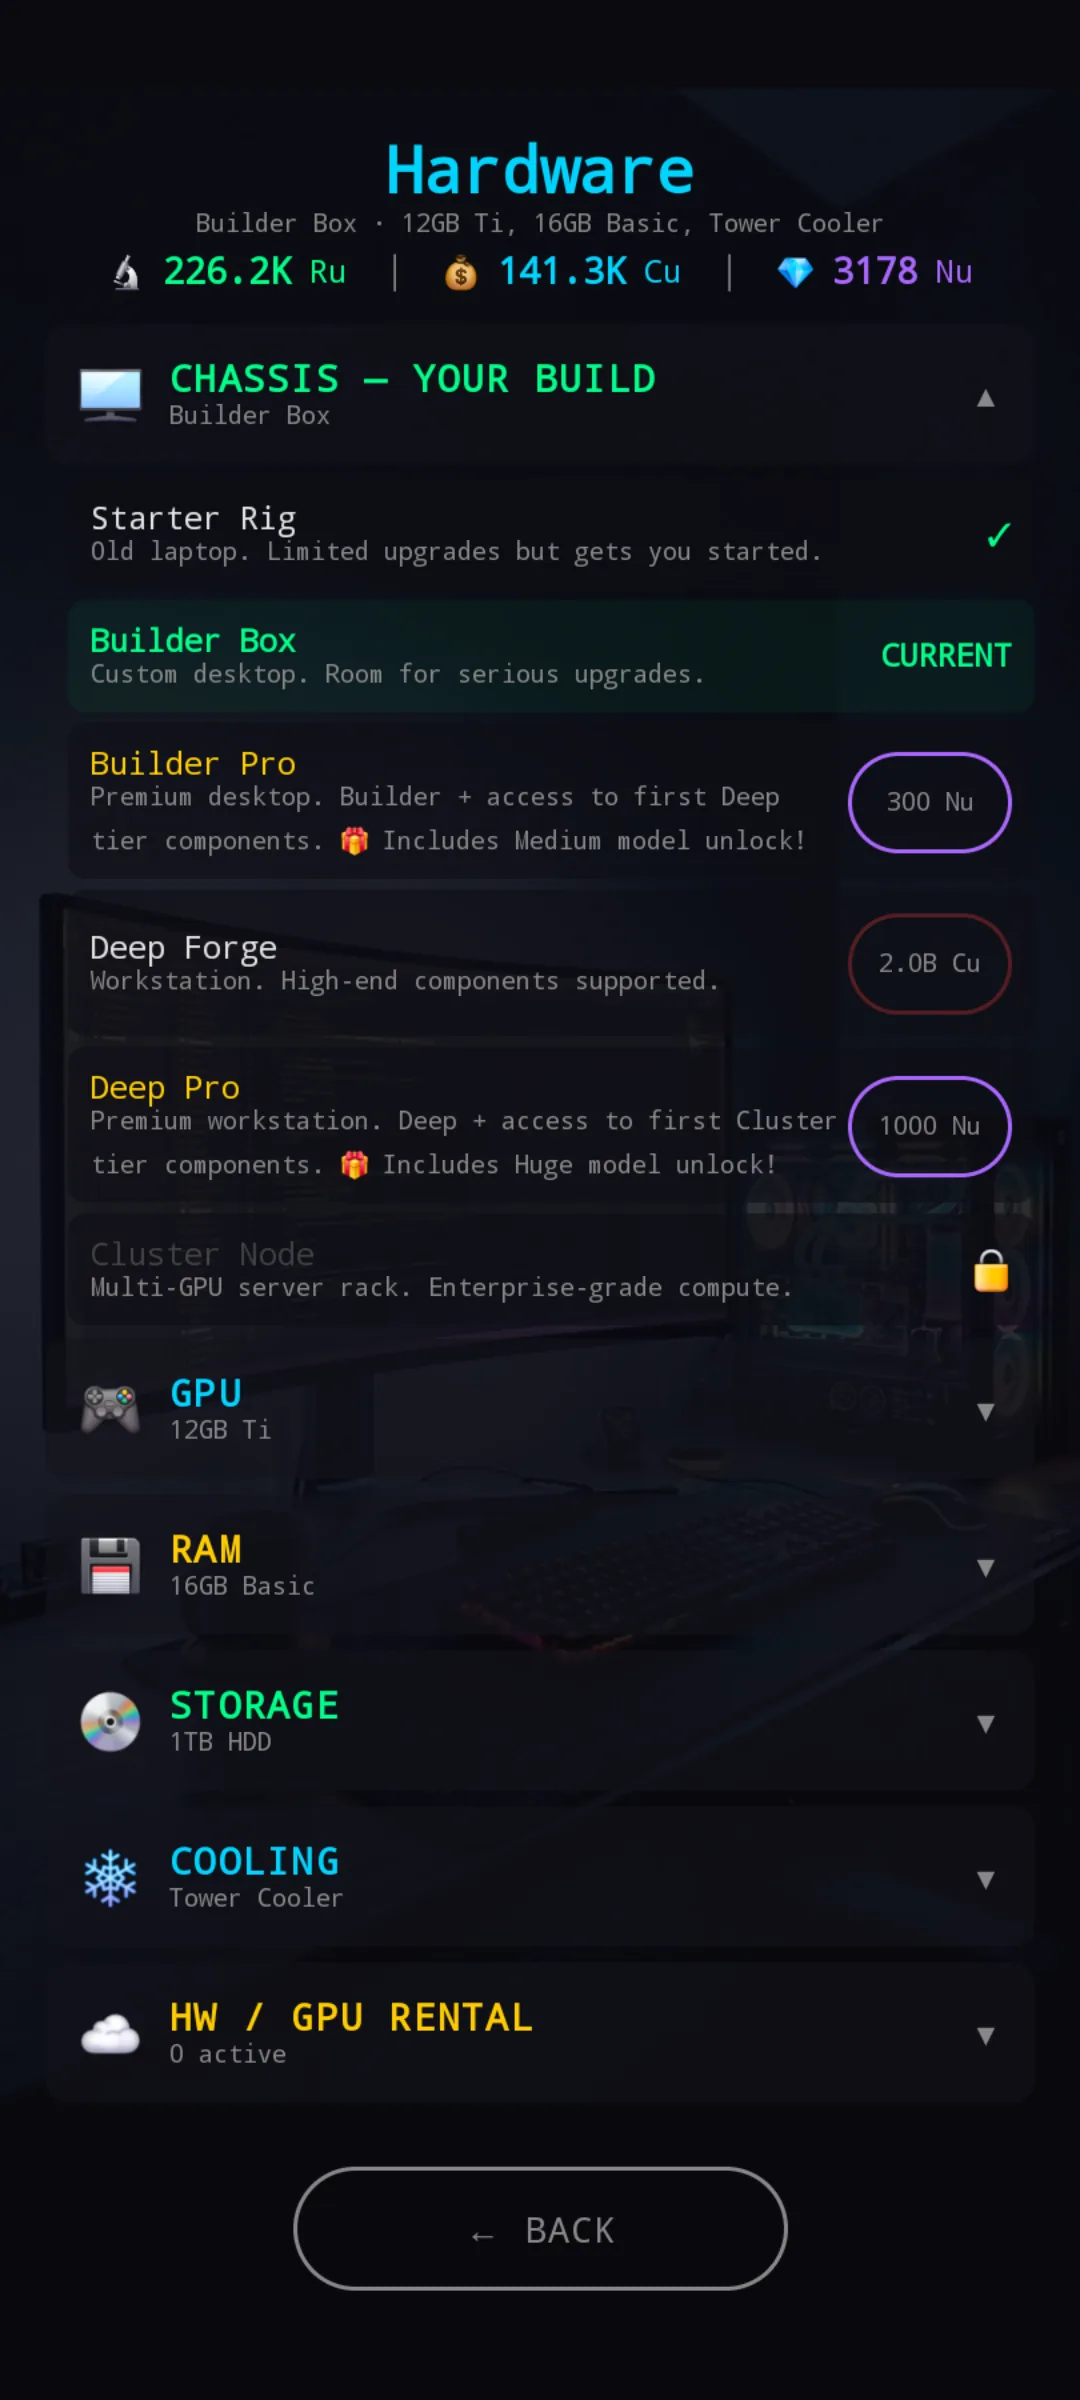
At a glance
The shop is organized around three axes:
- 4 chassis tiers — Starter / Builder / Deep / Cluster — plus two premium variants (Builder Pro, Deep Pro) that drop you on the matching tier with a free model unlock.
- 4 component categories — GPU, RAM, HDD, Cooling — each broken into size groups (e.g. 12GB / 16GB / 24GB at Builder tier).
- 3 rarities per size group — Bronze, Silver, Gold — improving stats and durability inside the group.
The chassis decides which size groups are even available to you. Each chassis you buy ships with its own Bronze-tier baseline kit (GPU / RAM / HDD / Cooling) — your previous components don't carry over, so a chassis jump is also a free baseline refresh. See What ships with each chassis below for the exact starter kits.
Chassis
| Chassis | Brain slots | Price |
|---|---|---|
| Starter Rig | 1 | Free (start) |
| Builder Box | 2 | 945 K Cu |
| Builder Pro ⭐ | 2 | 300 Nu (includes Medium model unlock) |
| Deep Forge | 3 | 2.02 B Cu |
| Deep Pro ⭐ | 3 | 1000 Nu (includes Huge model unlock) |
| Cluster Node | 5 | 1.36 T Cu |
Premium chassis (Builder Pro, Deep Pro) are Nu-bought shortcuts that drop you on the tier with a free model unlock. They're convenience, not power — the underlying tier is identical to the Cu version. Cluster has no Pro variant; the Cluster activation flow has its own free / paid routing instead (see Getting Started for the high-level loop).
What ships with each chassis
Every chassis (Cu or Nu) arrives with a pre-installed Bronze-tier component set within its own tier bracket. You can train immediately on a fresh chassis without buying anything else — upgrading is optional.
| Chassis | GPU | RAM | HDD | Cooling |
|---|---|---|---|---|
| Starter Rig | 4GB Laptop | 4GB Basic | 128GB HDD | Stock Fan |
| Builder Box | 12GB Gaming | 16GB Basic | 1TB HDD | Tower Cooler |
| Builder Pro ⭐ | 12GB Gaming | 16GB Basic | 1TB HDD | Tower Cooler |
| Deep Forge | 32GB Workstation | 48GB Basic | 8TB HDD | AIO 360 |
| Deep Pro ⭐ | 32GB Workstation | 48GB Basic | 8TB HDD | AIO 360 |
| Cluster Node | 80GB Datacenter | 128GB Basic | 24TB NVMe | Industrial |
Three things to notice:
- Pro variants are a paid skip, not a power-up. Builder Pro and Deep Pro ship with the same baseline components as their Cu twins — the Nu price buys a shortcut past the Cu grind to reach that tier. The bundled free model unlock (Medium for Builder Pro, Huge for Deep Pro) is a courtesy that saves the player from immediately grinding the next-tier model from scratch.
- Each upgrade funds the next — sale value of every brain compounds over the chain, and that compounding is what eventually buys the Builder chassis itself. You can skip rungs (group 2 between groups 1 and 3, for example), but the brain-sale cycle then takes longer to pay off the chassis. The baseline gap between Starter and Builder is real, but it's the floor you arrive at after climbing the Starter ladder — not a shortcut around it.
- The only time to stop upgrading is the very end of a chassis cycle. Within a tier, upgrades are the progress engine. But the chassis you're about to buy ships with baseline gear that already beats some of your current tier's Gold — a Builder default Tower cooler, for example, runs ahead of a Starter Gold Desktop. Once you're one or two purchases away from affording the next chassis, the math flips: skip the last Gold upgrade, pocket the Cu for the chassis itself, and let the new baseline do the refreshing.
How components are organized
Every component category (GPU, RAM, HDD, Cooling) has 12 size groups × 3 rarities = 36 items in the catalog. Your chassis decides which size groups you're allowed to install:
| Chassis | Component size groups available |
|---|---|
| Starter | groups 1–3 |
| Builder | groups 1–6 |
| Builder Pro | groups 1–7 |
| Deep | groups 1–9 |
| Deep Pro | groups 1–10 |
| Cluster | groups 1–12 |
Within a size group, Bronze → Silver → Gold improves both the stat values and the lifespan. Gold also tends to push slot counts (module slots / domain slots / active domains) one step higher than Bronze and Silver in that group.
GPU — VRAM, throughput, click power
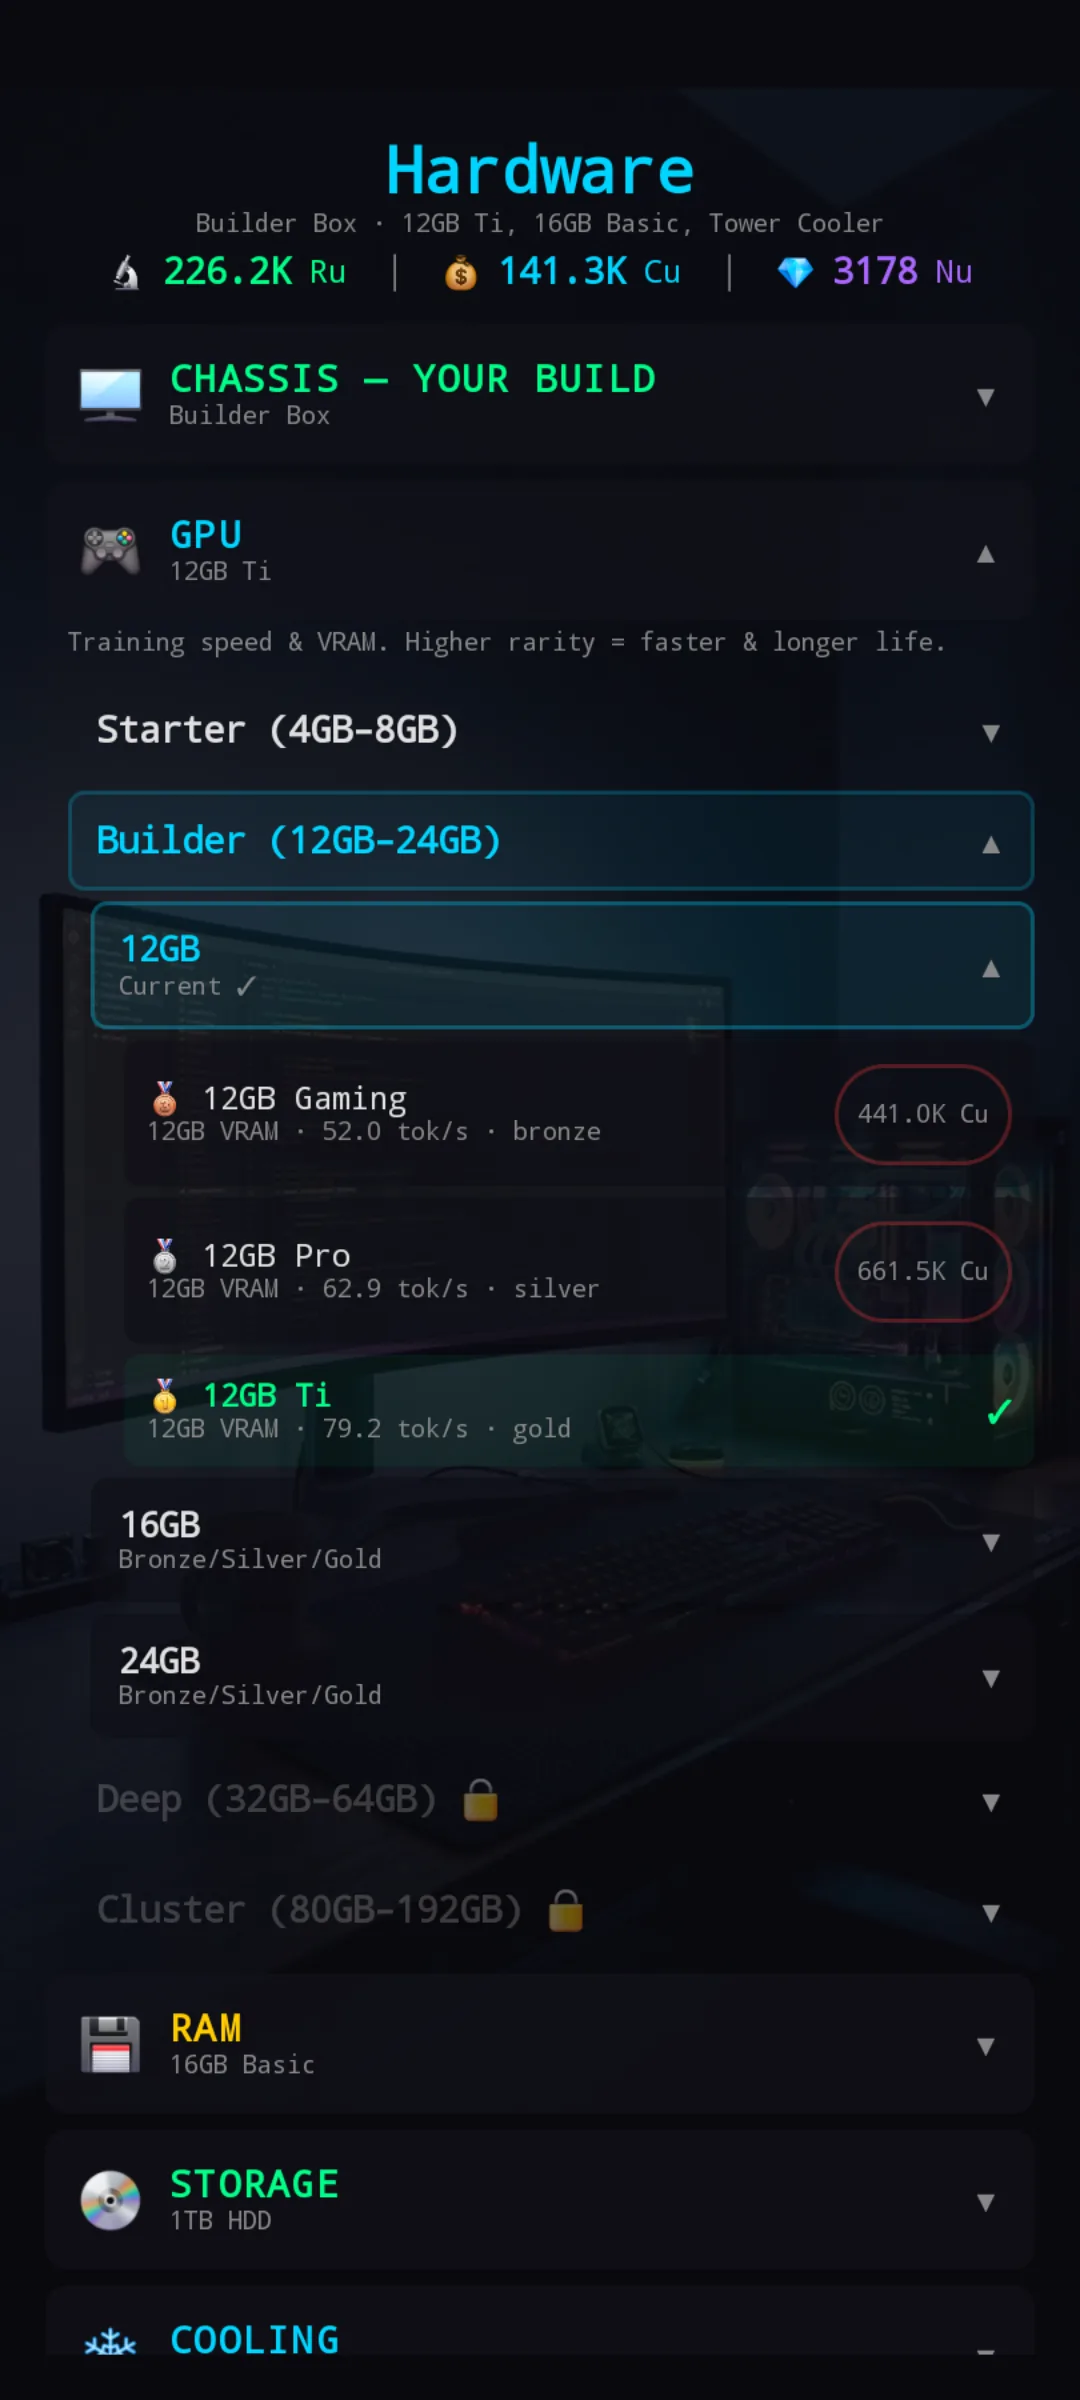
GPUs gate which model tiers you can train (VRAM requirement) and how fast a pretrain pushes through tokens. Two numbers matter: tok/s (idle pretrain rate) and tok/click (each tap's contribution while pretraining). They scale together. GPU does not affect run duration — that's cooling's job (see below).
| Tier | Size | Names (Bronze / Silver / Gold) | VRAM | Bronze tok/s | Bronze price |
|---|---|---|---|---|---|
| Starter | 4GB | Laptop / Desktop / Gaming | 4 | 12 | 1.75 K |
| Starter | 6GB | Entry / Desktop / Gaming | 6 | 18 | 7.35 K |
| Starter | 8GB | Desktop / Gaming / Pro | 8 | 28 | 105 K |
| Builder | 12GB | Gaming / Pro / Ti | 12 | 52 | 441 K |
| Builder | 16GB | Pro / Ti / Ultra | 16 | 84 | 6.3 M |
| Builder | 24GB | Workstation / Pro / Ultra | 24 | 132 | 252 M |
| Deep | 32GB | Workstation / Pro / Ultra | 32 | 196 | 1.06 B |
| Deep | 48GB | Cluster / Pro / Ultra | 48 | 292 | 7.56 B |
| Deep | 64GB | Workstation / Pro / Ultra | 64 | 420 | 151 B |
| Cluster | 80GB | Datacenter / Pro / Ultra | 80 | 612 | 635 B |
| Cluster | 128GB | HPC / Pro / Ultra | 128 | 888 | 1.51 T |
| Cluster | 192GB | Apex / Pro / Ultra (endgame) | 192 | 1288 | 6.05 T |
Silver gives a meaningful tok/s boost over Bronze in the same group; Gold raises it further. Tok/click scales together with tok/s at a fixed ratio.
RAM — module slots and Ru bonus
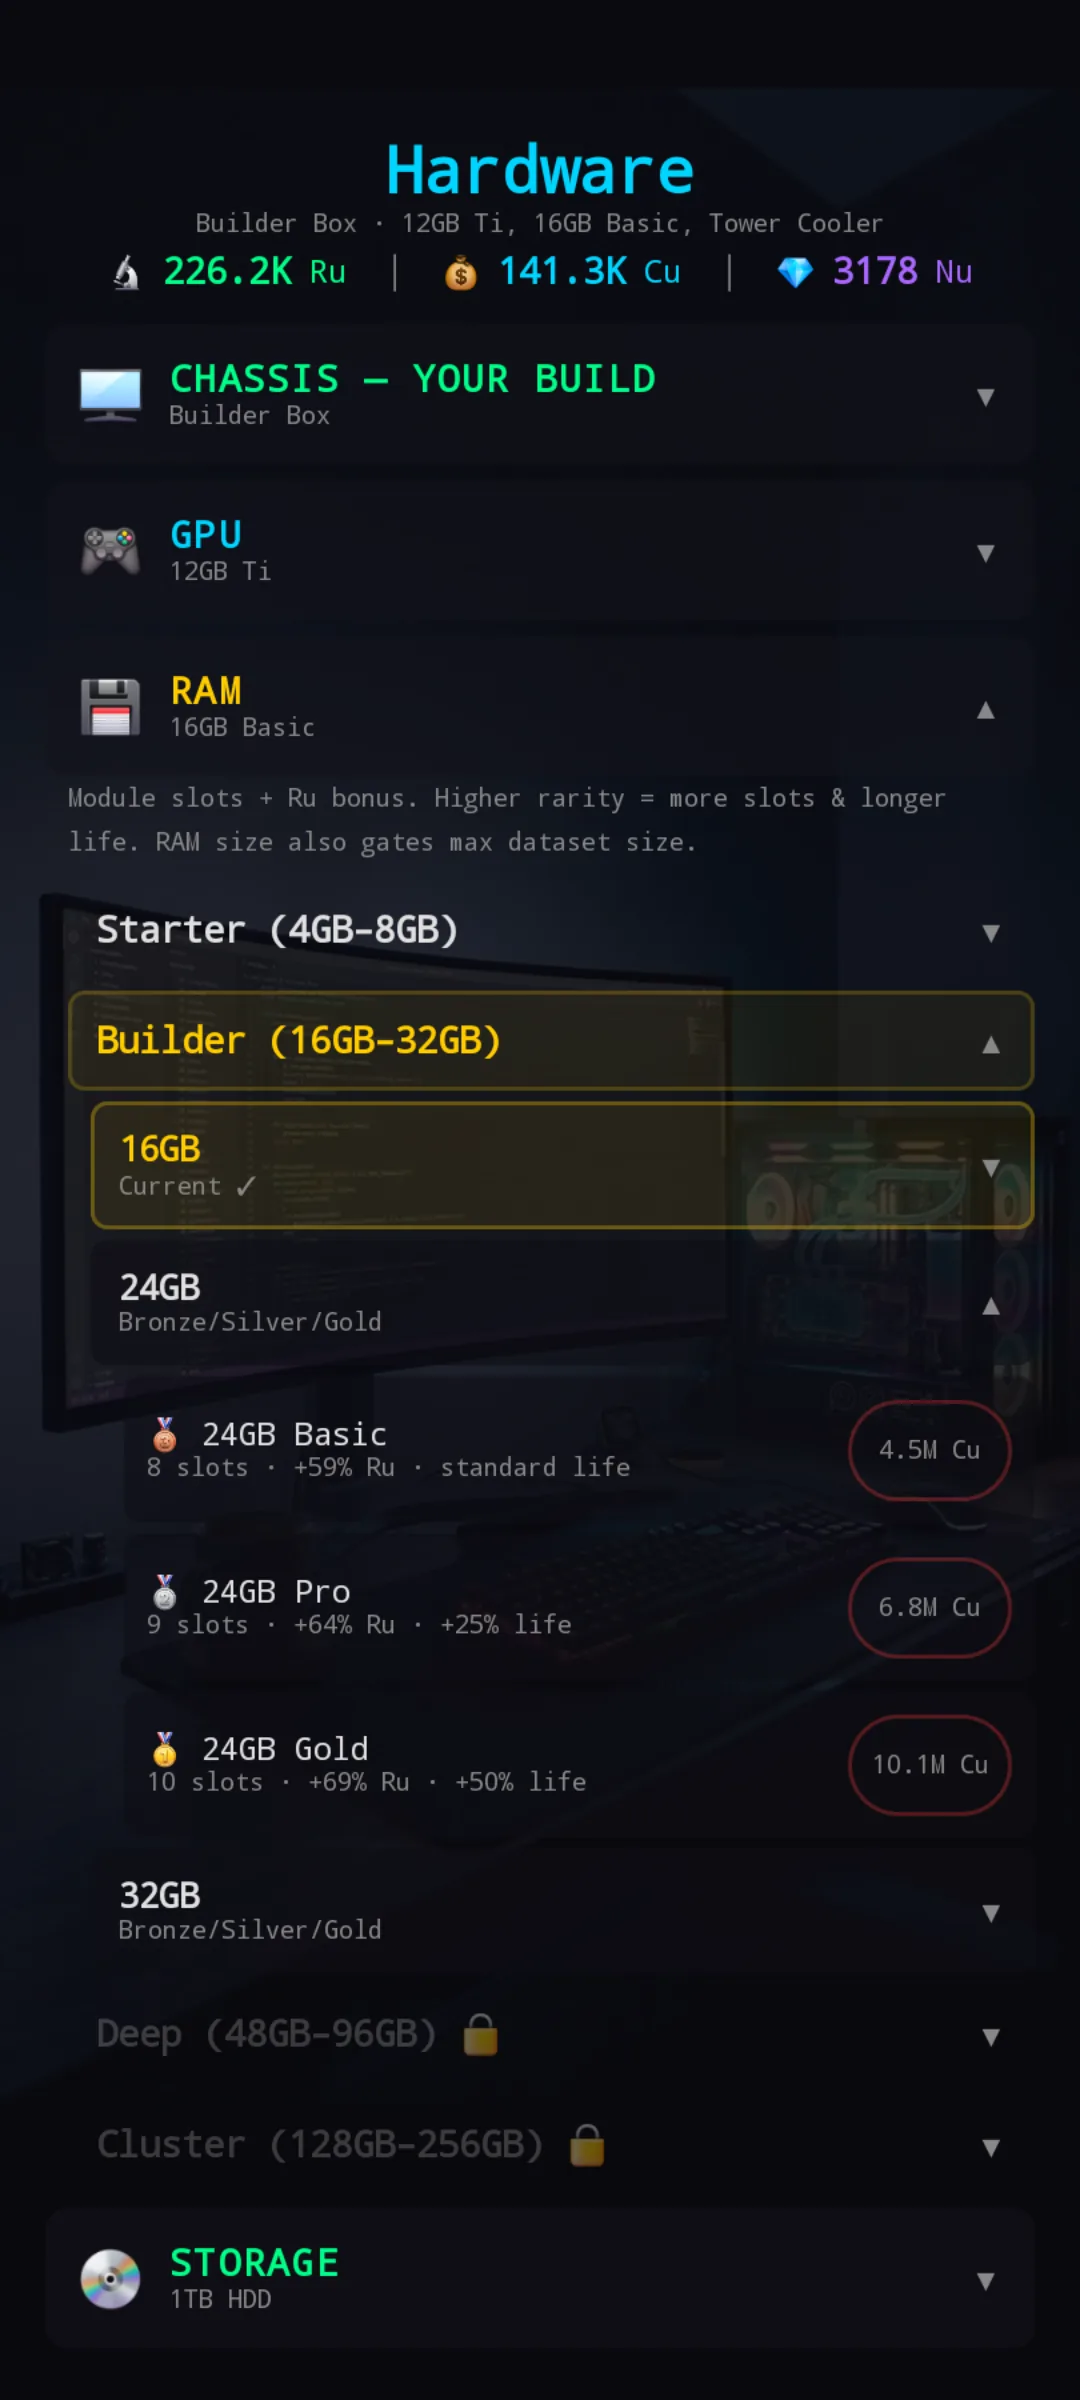
RAM determines how many modules you can have active on a brain — modules are the biggest lever in late-game brain construction. RAM also grants a small Ru bonus that scales with the tier index, plus the rarity affects lifespan (the card labels each tier as standard / +25% life / +50% life).
| Tier | Size | RAM | Bronze slots | Silver slots | Gold slots | Bronze price |
|---|---|---|---|---|---|---|
| Starter | 4GB | 4 | 3 | 3 | 4 | 1.25 K |
| Starter | 6GB | 6 | 4 | 4 | 5 | 5.25 K |
| Starter | 8GB | 8 | 5 | 5 | 6 | 75 K |
| Builder | 16GB | 16 | 7 | 8 | 9 | 315 K |
| Builder | 24GB | 24 | 8 | 9 | 10 | 4.5 M |
| Builder | 32GB | 32 | 9 | 10 | 11 | 180 M |
| Deep | 48GB | 48 | 11 | 12 | 13 | 756 M |
| Deep | 64GB | 64 | 12 | 13 | 15 | 5.4 B |
| Deep | 96GB | 96 | 14 | 15 | 17 | 108 B |
| Cluster | 128GB | 128 | 17 | 18 | 20 | 453 B |
| Cluster | 192GB | 192 | 19 | 21 | 23 | 1.08 T |
| Cluster | 256GB | 256 | 22 | 23 | 25 | 4.32 T |
RAM size also gates the largest dataset you can run.
HDD — owned-domain cap, active-domain bonus
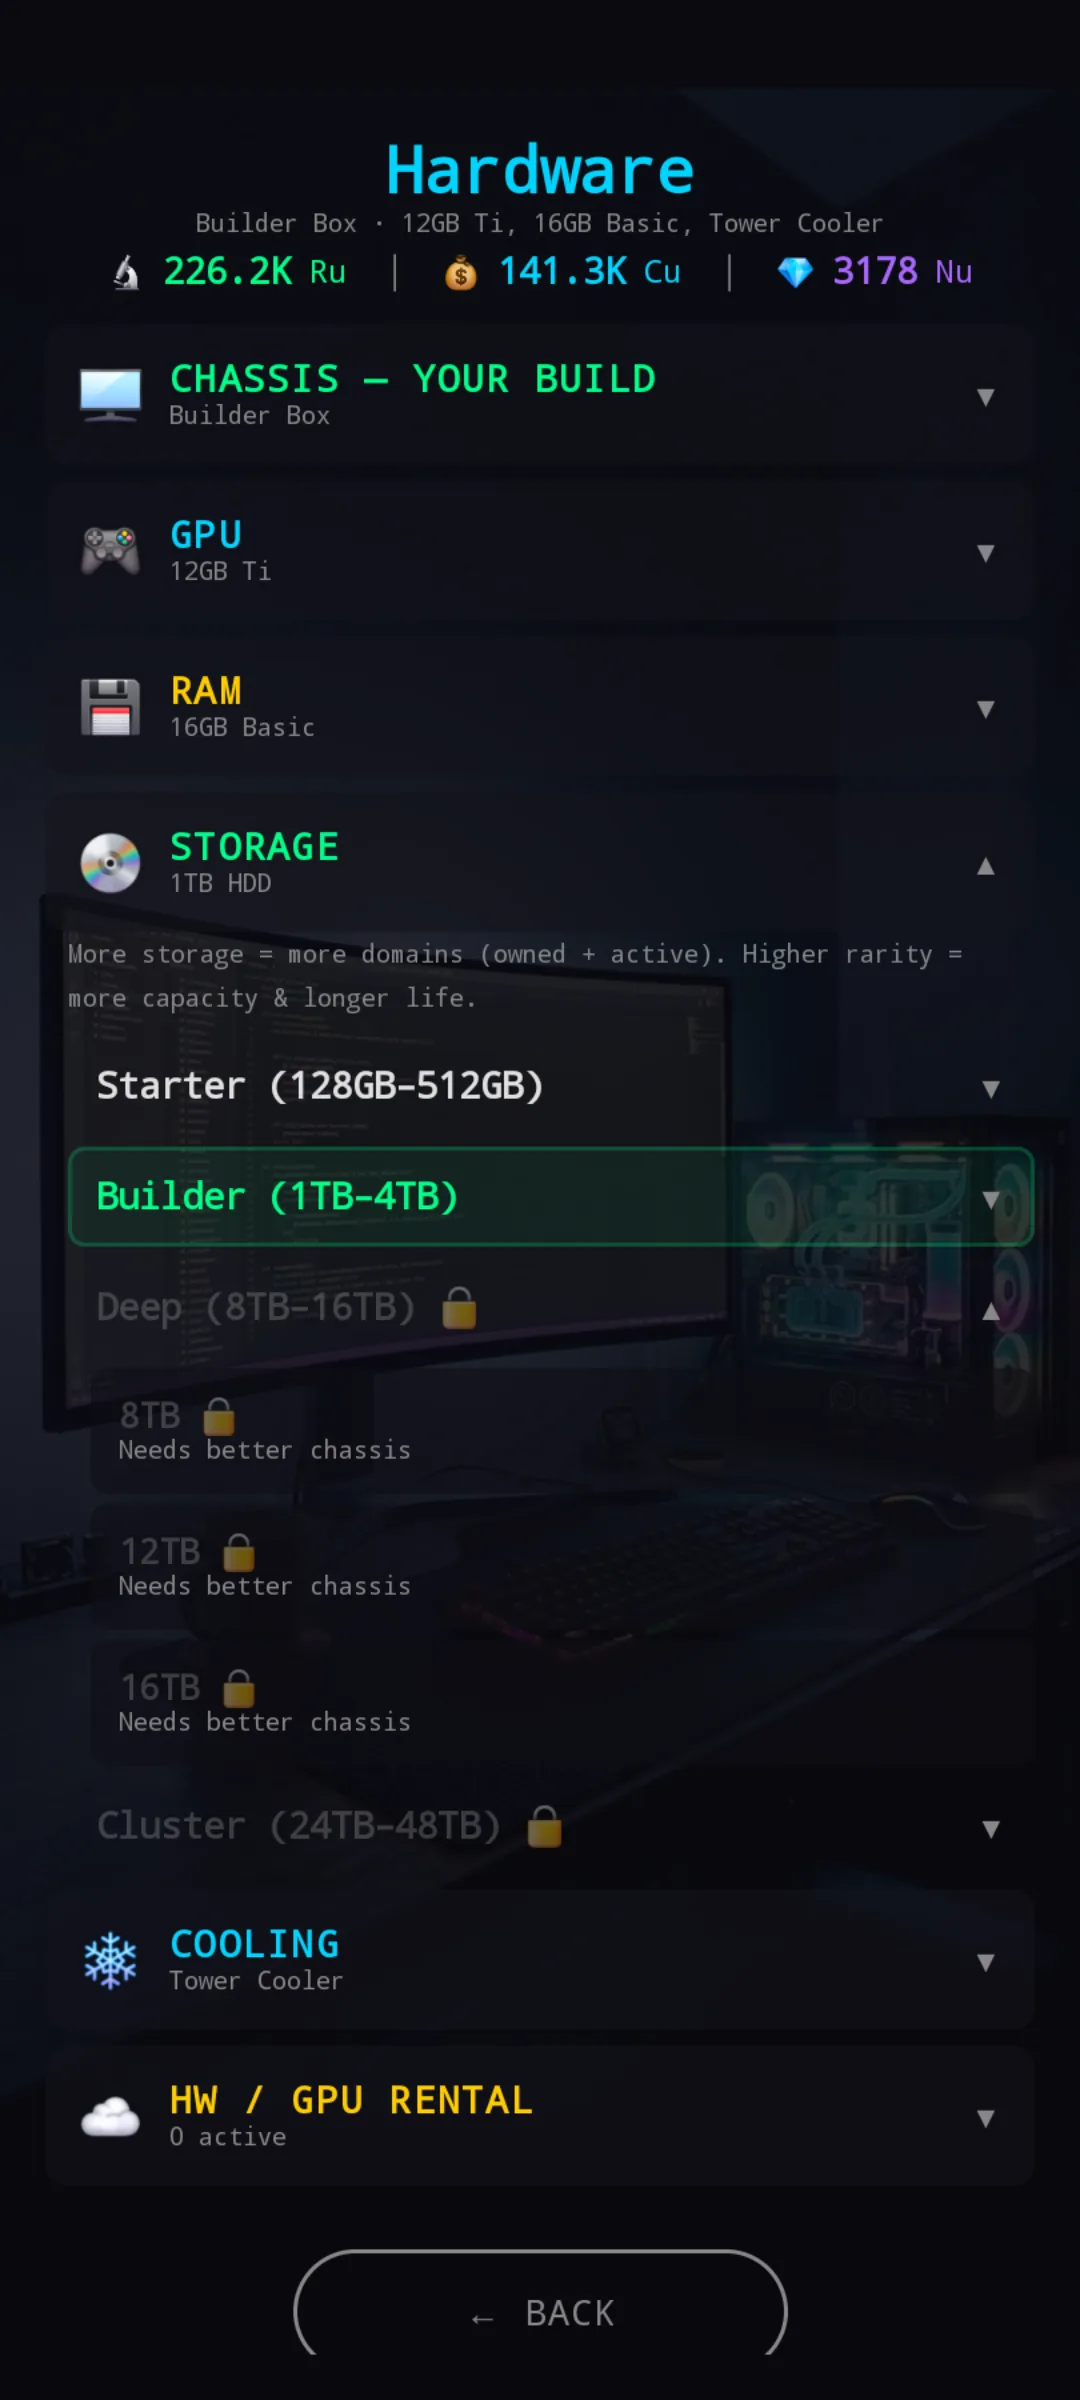
HDD is the only place you raise your owned-domain capacity (how many domains can sit in your collection) and the only standard component that raises active domain slots (how many domains you can equip simultaneously in a run).
| Tier | Size | Bronze owned | Silver owned | Gold owned | Bronze active | Gold active | Bronze price |
|---|---|---|---|---|---|---|---|
| Starter | 128GB | 3 | 4 | 5 | +0 | +1 | 750 |
| Starter | 256GB | 4 | 5 | 6 | +1 | +2 | 3.15 K |
| Starter | 512GB | 5 | 6 | 7 | +2 | +3 | 45 K |
| Builder | 1TB | 7 | 8 | 9 | +3 | +4 | 189 K |
| Builder | 2TB | 9 | 10 | 11 | +4 | +5 | 2.7 M |
| Builder | 4TB | 11 | 13 | 15 | +5 | +6 | 108 M |
| Deep | 8TB | 15 | 17 | 19 | +6 | +7 | 453 M |
| Deep | 12TB | 18 | 20 | 22 | +7 | +8 | 3.24 B |
| Deep | 16TB | 21 | 23 | 25 | +8 | +9 | 64.8 B |
| Cluster | 24TB | 23 | 25 | 27 | +9 | +10 | 272 B |
| Cluster | 32TB | 25 | 27 | 29 | +10 | +11 | 648 B |
| Cluster | 48TB | 27 | 29 | 31 | +11 | +12 | 2.59 T |
Active slots stack with the dataset bonus (1–8 depending on dataset size) and the Memory Replay upgrade (+1). The endgame ceiling is 8 + 12 + 1 = 21 active slots simultaneously — out of 40 unique domains in the game. Owned-cap endgame is 31 (HDD) + 3 (Specialist Excelent bonus, one per Agent path) = up to 34 owned out of 40.
Cooling — run duration engine
Cooling is measured on a 1–32 scale. Cooling 1 is the Starter Stock Bronze cooler; Cooling 32 is Cluster Cryo Gold. Every step along the ladder shortens the run and reduces the click count required to finish it.
| Cooling | Rig | Run duration | Clicks to finish (approx.) |
|---|---|---|---|
| 1 | Starter Stock Bronze | ~60 min | ~150 |
| 32 | Cluster Cryo Gold | ~30 min | ~50 |
Intermediate coolers scale proportionally. Run boosts stack on top of cooling — a max-stacked run on Cluster Cryo Gold clears in about 9 minutes instead of 30. See the Run Configuration guide for the boost math.
| Tier | Name | Bronze price |
|---|---|---|
| Starter | Stock | 1.25 K |
| Starter | Basic | 5.25 K |
| Starter | Desktop | 75 K |
| Builder | Tower | 315 K |
| Builder | Dual | 4.5 M |
| Builder | AIO | 180 M |
| Deep | AIO+ | 756 M |
| Deep | Custom | 5.4 B |
| Deep | Custom+ | 108 B |
| Cluster | Industrial | 453 B |
| Cluster | Datacenter | 1.08 T |
| Cluster | Cryo | 4.32 T |
Within each cooling tier, Bronze → Silver → Gold is a clean linear upgrade: higher position on the 1–32 scale, better wear resistance, longer lifespan. Gold coolers are especially worth it in long sessions — the reduced repair costs offset the price premium.
Rarity at a glance
Across every component category, the same three rarities apply within each size group:
- Bronze — entry. Cheapest in the group, lowest stats, shortest lifespan.
- Silver — mid. Costs noticeably more than Bronze, modest stat lift, longer life.
- Gold — premium. Most expensive in the group, best stats, longest life. Often raises slot counts (module / domain / active) by one step.
When budget is tight, bumping rarity within a tier is sometimes a better next purchase than jumping to the next tier's Bronze — you get most of the stat lift without the larger upfront cost.
Buying strategy by chassis
- Starter — focus the first Cu on a Silver/Gold cooler. Every step on the cooling ladder trims run duration forever. RAM second (module slots open up build options). HDD and GPU can stay Bronze for a while.
- Builder — module slots really start mattering. Builder-tier Gold RAM hits 11 slots, enough to start running 3+ module brains comfortably. Pair with a mid-tier cooler and a mid-tier GPU sized for Medium.
- Deep — owned-domain cap is the throttle. Deep-tier Gold HDD gets you to 19 owned domains, opening Specialist paths and bigger Dream contracts. Don't sleep on cooling — the run-duration gap between AIO+ and Custom+ is huge.
- Cluster — endgame: every category has a meaningful ceiling jump. Prioritize Cryo Gold cooling and 48TB Gold HDD first for the highest leverage; GPU and RAM follow as you push Colossus-scale models.
The shortest path to the next chassis tier is to grind a full Bronze/Silver/Gold line on every category in your current chassis — but heavy grind without that linkage is doable too if you prefer to push raw Cu earnings instead.
Rental — Cloud GPUs and rented rigs
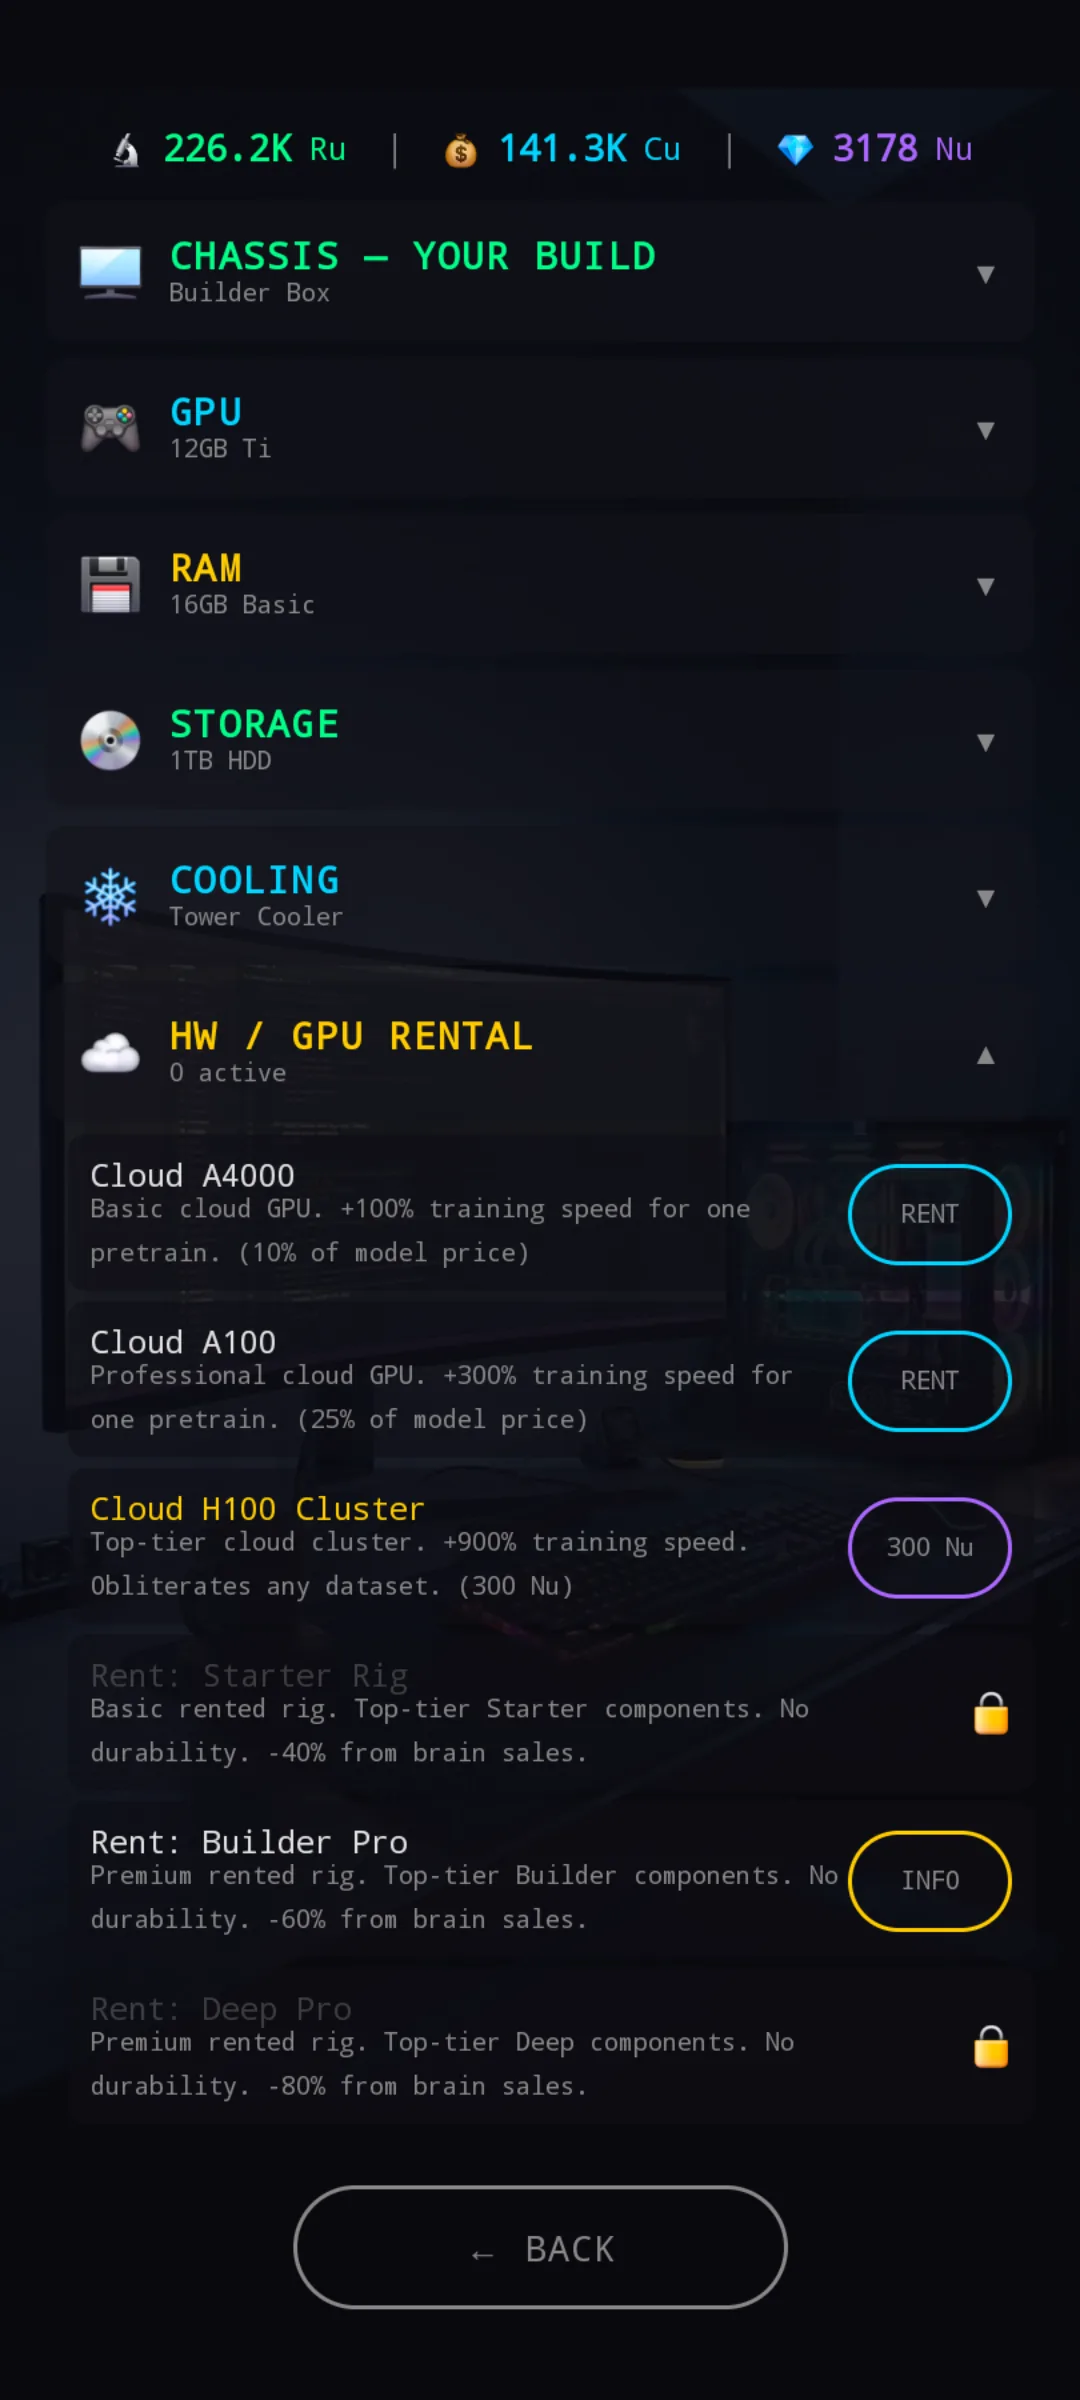
The HW / GPU Rental row covers two parallel rental tracks:
Cloud GPU rentals (per-pretrain)
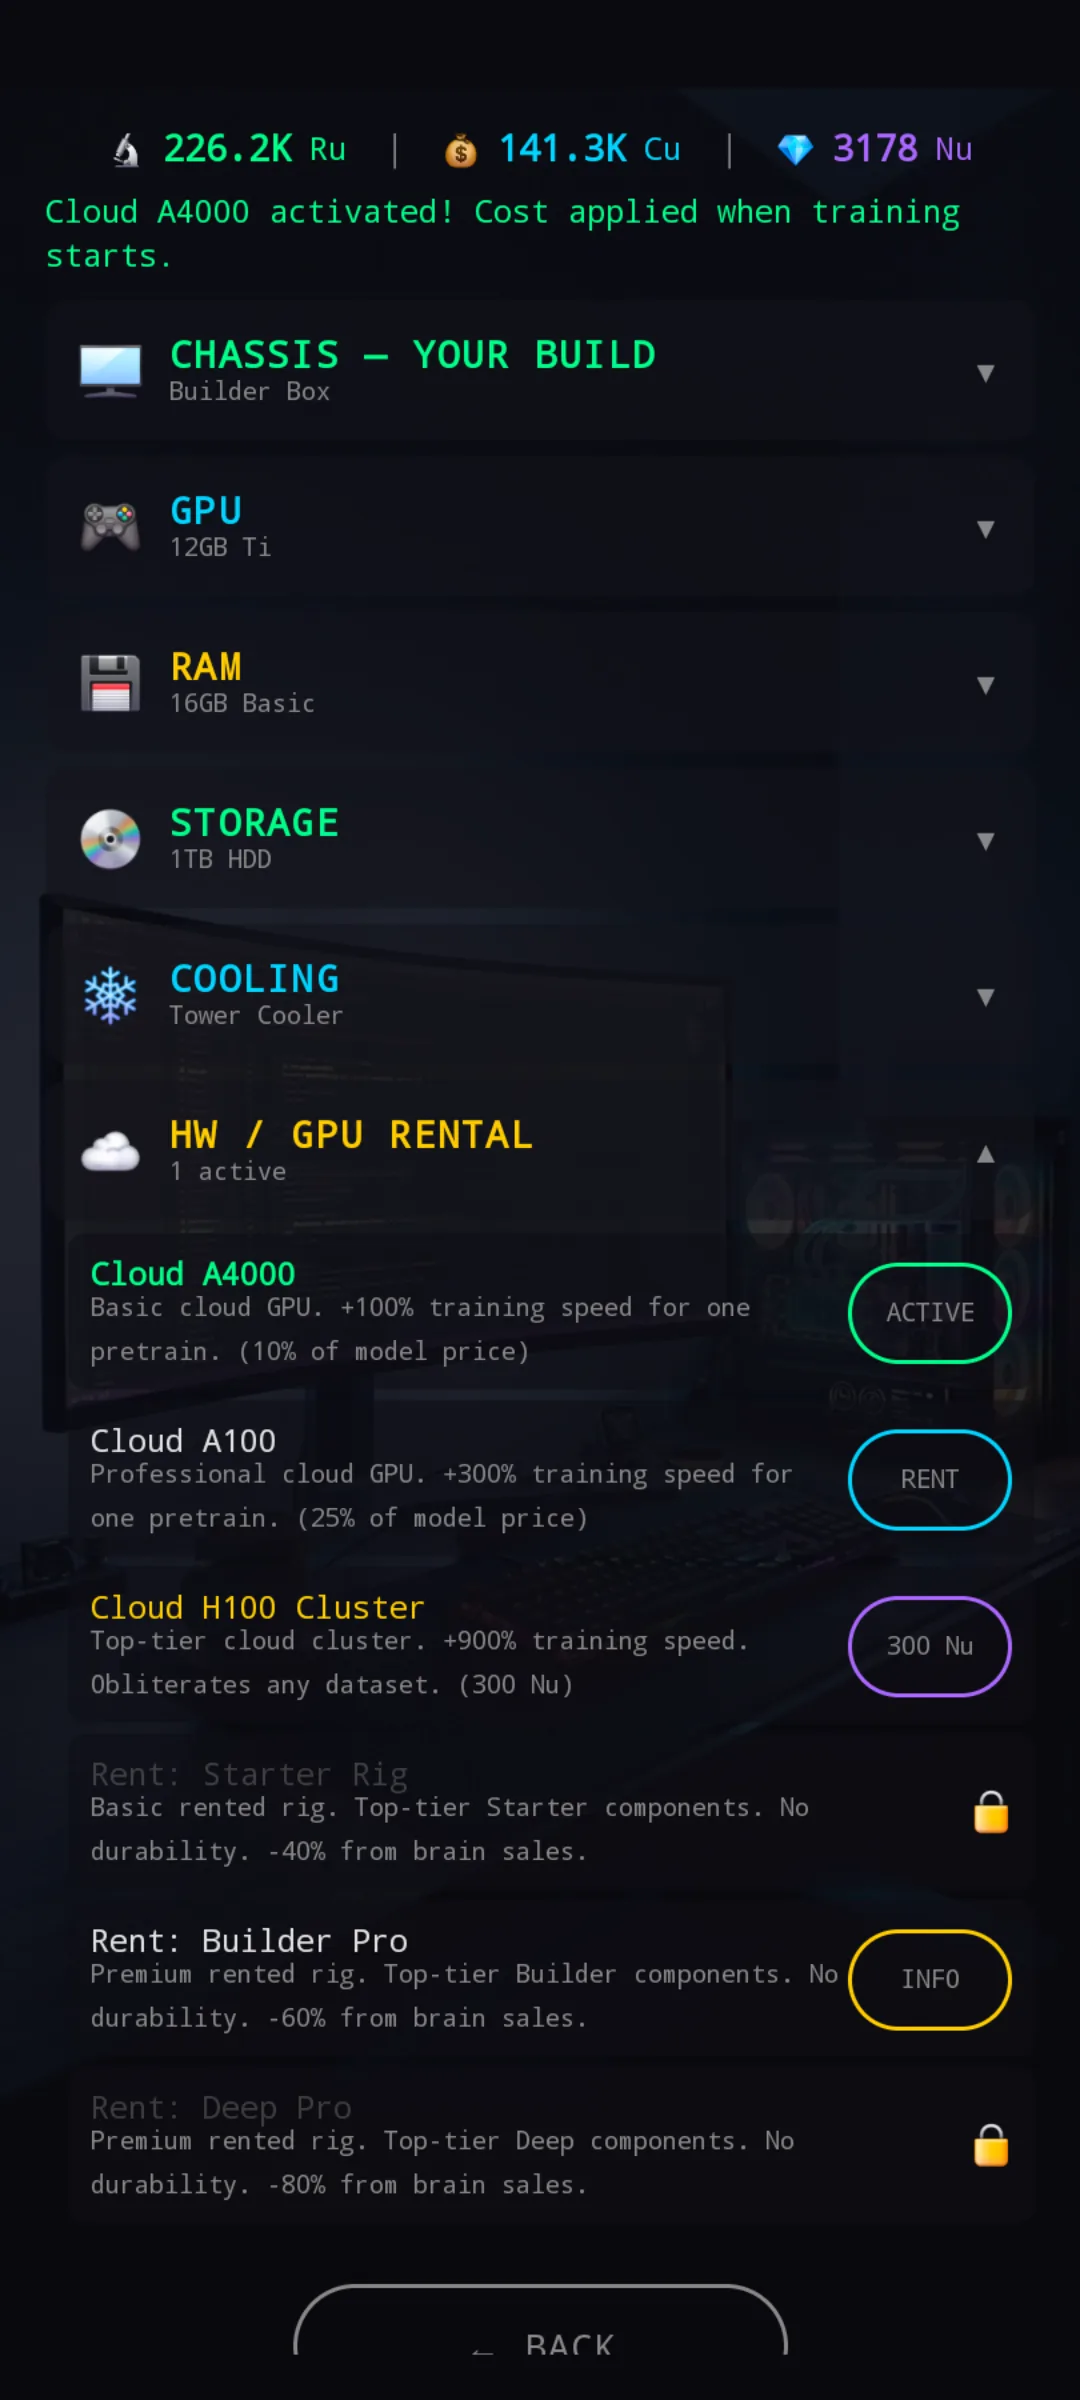
One-shot pretrain accelerators. The cost is applied when the training actually starts — activating the rental is risk-free until you press Start on the Pretrain screen.
- Cloud A4000 — +100 % training speed for one pretrain. Cost: 10 % of the model price.
- Cloud A100 — +300 % training speed for one pretrain. Cost: 25 % of the model price.
- Cloud H100 Cluster — +900 % training speed, obliterates any dataset. Cost: 300 Nu (premium).
Chassis rentals (premium top-tier components)
You can only rent at your current chassis tier — Starter players can rent a Starter rental rig, Builder players can rent a Builder Pro rental, Deep players can rent a Deep Pro rental. Cluster cannot be rented.
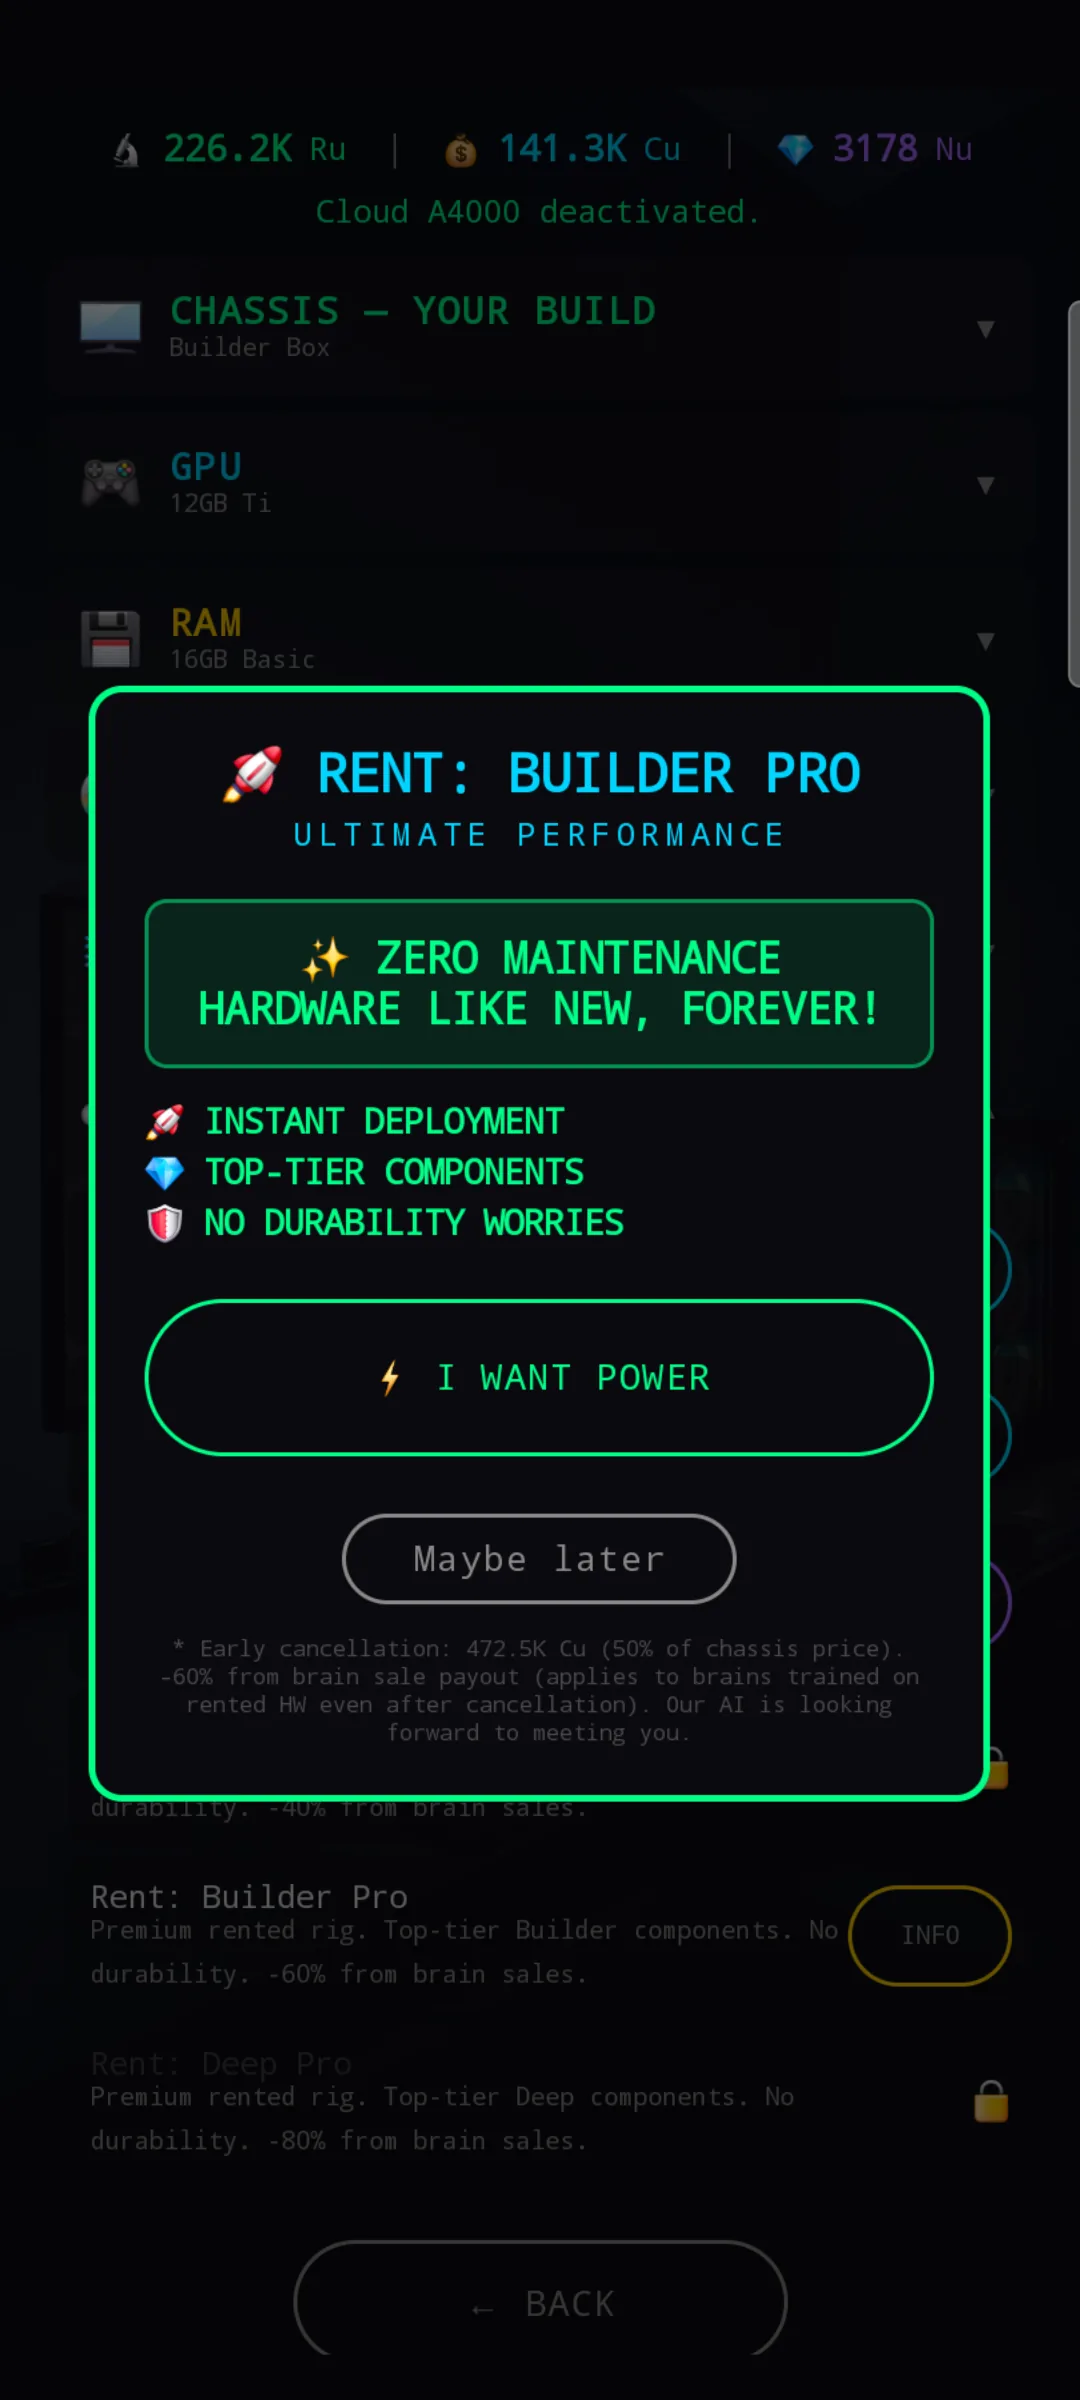
Rental rigs are top-tier components with no durability (no repair costs ever) — but they apply a percentage cut to every brain sale made while the rental is active:
- Starter rental rig — −40 % from brain sales.
- Builder Pro rental — −60 % from brain sales.
- Deep Pro rental — −80 % from brain sales.
Where Black Market hardware fits in
Black Market items are a parallel track. They roll random affixes on top of a standard component baseline, can exceed certain caps (gate-breaking affixes like Extra Slots, Domain Master, VRAM Boost), and can't be repaired. They complement the standard track rather than replace it: a standard Gold cooler + a BM RAM with Extra Slots is a typical late-game setup.
When evaluating a BM offer, compare its name + size against the standard-HW tables above to get the baseline, then read the affix line and rarity from the Black Market items reference to judge the premium.
Quick tips
- Stay one chassis tier ahead of the model you're training. Wear drops dramatically when the rig isn't being pushed to its ceiling (see the Hardware screen guide).
- Cooler first on every new chassis. Idle steps per second compound across every run forever.
- RAM rarity is worth paying for — extra module slots open up brains a Bronze-only rig can never run.
- Don't rent on a multi-brain rig before topping slots — the rental cut sticks to every brain that ever trained on the rented hardware.
- Cloud GPUs are risk-free until you press Start — feel free to toggle them and explore the pretrain config before committing.